For centuries, ancient cultures believed that “tooth worms” were the primary cause of tooth decay. While a squirming worm might make for a dramatic (and terrifying) animation, modern dentistry has long since debunked that myth. Today, we know that cavities are caused by a combination of bacteria, acid, and a sugary diet.
But what actually happens when you sit in the dentist’s chair to get that decay fixed? If you have ever seen a viral video of a tooth being filled, you might be curious about all the colorful gels, tiny brushes, and bright blue lights. Getting a cavity filled is a fascinating, highly precise procedure. Let’s break down the step-by-step process of a modern composite dental filling.
What is a Cavity and Why Do We Need Fillings?
Before diving into the fix, it helps to understand the problem. A cavity is essentially a permanent hole in your tooth caused by decay. This process begins when plaque—a sticky, invisible film of bacteria—builds up on your teeth. When you consume sugary or starchy foods, these bacteria feast on the remnants, producing harsh acids as a byproduct.
Over time, these acids eat away at the hard, protective outer layer of your tooth, known as enamel. If left untreated, the decay can penetrate deeper into the softer dentin layer and eventually reach the tooth’s sensitive nerve, causing severe pain, infection, and potentially leading to a root canal or extraction.
Catching a cavity early is crucial. When your dentist spots a dark spot on an X-ray or you feel a slight twinge of sensitivity to cold drinks, it is usually time for a filling. The goal of a filling is simple: remove the diseased portion of the tooth, halt the decay, and restore the tooth’s structural integrity and function.
The Step-by-Step Procedure: Inside a Composite Filling
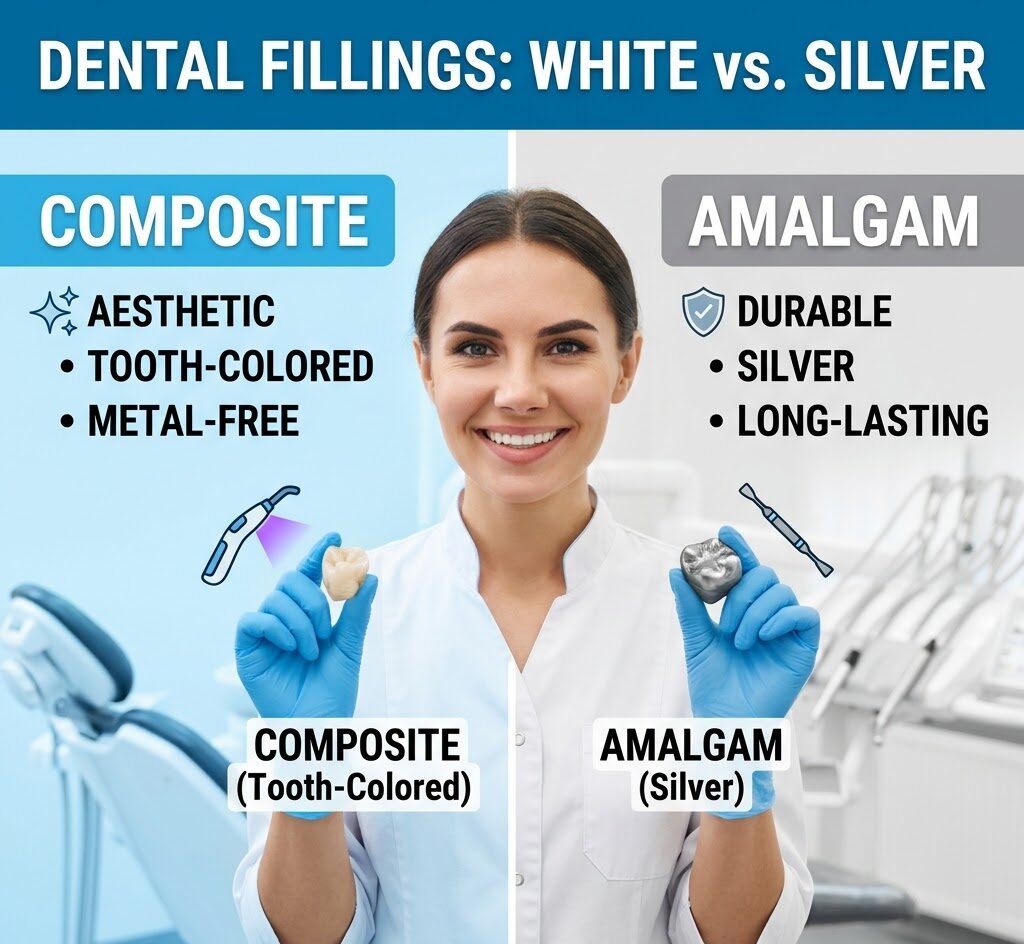
The modern approach to fixing a cavity is a marvel of dental science, frequently utilizing a tooth-colored composite resin instead of old-school silver metals. Here is the exact breakdown of what happens during the procedure.
Step 1: Removing the Decay
The first step is to remove the diseased part of the tooth. After ensuring the area is completely numb with a local anesthetic, the dentist uses a specialized dental drill to carefully excavate the decayed enamel and dentin. This cleans out the “mushy” infected areas, leaving behind a strong, healthy foundation for the new filling material.
Step 2: Preparing the Surface (The Blue Gel)
Once the cavity is entirely clean, the dentist applies a bright blue gel to the inside of the tooth. This is called an “etchant,” which is typically made of a mild phosphoric acid. The purpose of this step is to microscopically roughen the surface of the tooth. Think of it like sanding a smooth piece of wood before applying a coat of paint; the roughened surface gives the filling material a textured grip. After a few seconds, this blue gel is thoroughly rinsed away with water, and the tooth is dried.
Step 3: Applying the Glue (The Yellow Liquid)
Next, a yellowish liquid is brushed into the prepared, etched cavity. This is the bonding agent—essentially a high-tech, medical-grade dental glue. It seeps into the microscopic pores created by the acid etch in the previous step, creating a highly adhesive layer that will anchor the final filling securely to your natural tooth structure.
Step 4: Placing the Composite Resin
Now comes the actual filling. The dentist squirts in a soft, pliable material called composite resin. Because this resin is initially putty-like, the dentist can easily mold, shape, and sculpt it to match the exact natural grooves and contours of your tooth.
Step 5: Setting the Filling (The Blue Light)
To harden the soft resin, the dentist uses a specialized blue ultraviolet (UV) curing light. When this bright blue light hits the resin, it triggers a rapid chemical reaction. Within a matter of seconds, the pliable putty cures, hardening into a durable, solid state that can withstand the intense pressures of chewing.
Step 6: Polishing for Perfection
The final step is to polish the newly hardened filling. The dentist will use a tiny, spinning polishing tool to smooth out any rough edges and ensure your bite feels perfectly natural when you close your mouth. This polishing step also gives the restored tooth a natural, healthy shine.
Why Choose Composite Resin Fillings?
You might wonder why modern dentists prefer this white, liquid-to-solid material over the silver amalgam fillings of the past. Composite resin fillings offer several distinct advantages for your oral health:
-
Aesthetics: Because the resin can be custom-blended to match the exact shade of your natural teeth, the filling is virtually invisible.
-
Conservation of the Tooth: Composite fillings require less removal of healthy tooth structure compared to traditional metal fillings.
-
Strength and Support: The chemical bonding process allows the resin to actively support the remaining tooth structure, helping to insulate the tooth and prevent future cracks or breakages.
The Bottom Line on Dental Health
Getting a cavity filled might seem daunting, but it is a routine, highly effective procedure designed to save your natural tooth and protect your overall well-being. From the initial drill to the final polish, modern dental technology ensures the process is quick, virtually painless, and cosmetically seamless.
Of course, the best filling is the one you never need. Maintaining a robust oral hygiene routine—brushing twice a day, flossing daily, and limiting sugary snacks—is your first line of defense. Don’t forget to schedule regular cleanings and checkups with your dentist to catch any potential issues before they become major problems. A healthy, cavity-free mouth is a vital cornerstone of your overall wellness journey.