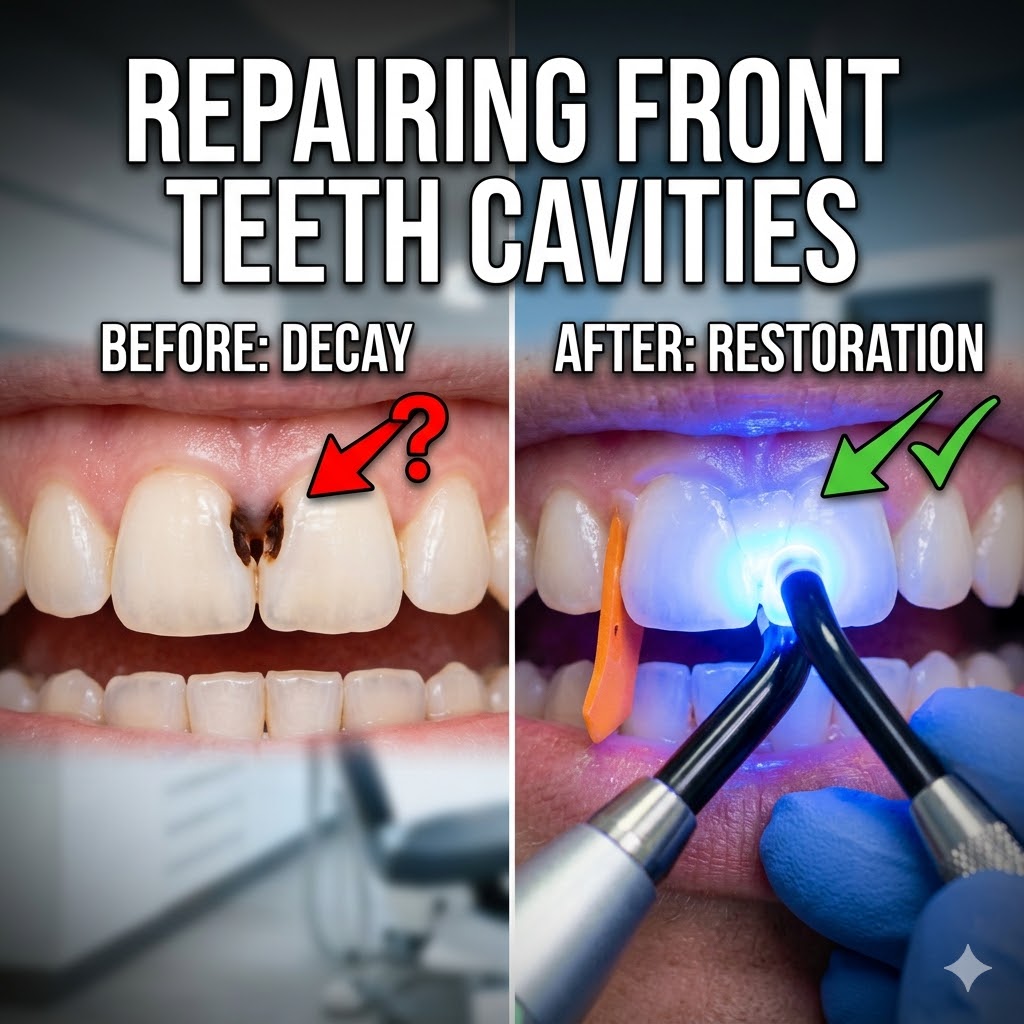
Finding out you have a cavity is never pleasant news, but discovering decay between your front teeth can be particularly nerve-wracking. Your front teeth, or anterior teeth, are the focal point of your smile, playing a crucial role in your facial aesthetics, speech, and overall confidence. When a cavity develops in this highly visible area, it requires a precise, delicate approach to restore both the health of the tooth and its natural appearance. If your dentist recently told you that you need a filling between your front teeth, there is no need to panic. Modern dental technology allows professionals to repair these issues seamlessly. In this comprehensive article, we will walk you through the step-by-step process of an anterior composite restoration, explaining exactly what happens during the procedure.
Why Does Decay Happen Between Front Teeth?
Before diving into the solution, it helps to understand why these cavities form in the first place. The tight spaces between our teeth are notoriously difficult to reach with a standard toothbrush. Without regular flossing, plaque—a sticky film of bacteria—accumulates in these hidden crevices. Over time, bacteria feed on dietary sugars and produce harmful acids that slowly wear away the tooth’s enamel. Because the enamel on your front teeth is relatively thin compared to your back molars, decay can spread quickly if left untreated, making early detection and repair essential.
Step 1: Precision Cleaning and Preparation
The journey to restoring your tooth begins with careful preparation. Once the area is completely numb, the dentist’s first objective is to remove the active decay. Using a specialized, high-speed dental drill, the dentist meticulously cleans out the cavity. This step is incredibly critical; all the bacteria and damaged enamel must be completely removed to prevent the decay from progressing further beneath the new filling. This creates a clean, solid, and healthy foundation for the filling material to adhere to.
Step 2: Etching the Tooth Surface
With the tooth free of decay, the next phase focuses on preparing the enamel to bond with the composite filling. The dentist applies a specialized blue gel to the prepared area. This is known as an acid etch. While the word “acid” might sound intimidating, it is entirely safe and vital for a long-lasting filling. The etch microscopically roughens the tooth surface, creating tiny pores that allow the bonding materials to grip the tooth securely, ensuring the restoration does not fall out.
Step 3: Strict Moisture Control and Isolation
One of the most important elements of a successful composite filling is keeping the tooth absolutely dry. Tooth-colored filling materials are highly sensitive to moisture; even a tiny drop of saliva can ruin the bond. To achieve this dryness, the dentist carefully isolates the tooth, often placing absorbent cotton rolls underneath the lip to keep the area clear and keep your lip away from the tooth. Sometimes, a tiny green retraction cord is tucked into the gumline to prevent bleeding or moisture from interfering.
Step 4: Applying the Dental Adhesive
Once the tooth is completely dry, the dentist applies a bonding agent, which often looks like a yellow liquid. Think of this as a highly advanced dental glue. It seeps deep into the microscopic pores created by the blue etching gel. To set this adhesive, the dentist uses a specialized blue curing light. This intense light triggers a chemical reaction that hardens the bond instantly, locking it into the natural tooth structure.
Step 5: Placing and Shaping the Resin
Now comes the artistic part of the procedure. To ensure the filling doesn’t accidentally stick to the adjacent tooth, the dentist slides a thin metal or plastic strip, called a matrix band, between the teeth. A small orange wedge is then inserted near the gumline to hold the strip firmly in place and ensure tight contact.
Next, the dentist applies the composite resin—a putty-like, tooth-colored material. Using delicate spatulas and brushes, they expertly sculpt the resin, molding it to seamlessly recreate the natural contours and shape of your original tooth. Once the shape is perfectly complete, the blue curing light is used again to harden the resin permanently.
Step 6: Polishing for a Flawless Finish
After the resin sets, the band and wedge are removed. The filling is solid but may have a slightly rough texture. The final step involves polishing the restoration. The dentist uses fine drills to smooth the surface, ensuring the restored tooth reflects light just like your natural enamel. Finally, the protective green cord is gently removed from the gums, leaving behind a perfectly shaped tooth.
Conclusion
Repairing a cavity between your front teeth is a meticulous blend of science and art. By understanding this step-by-step process—from the initial cleaning and etching to the careful shaping and final polish—you can sit in the dental chair with complete confidence. Thanks to modern composite restorations, your dentist can seamlessly eliminate decay and restore the structural integrity of your tooth. The result is a healthy, beautiful, and completely natural-looking smile that you can proudly share with the world.